
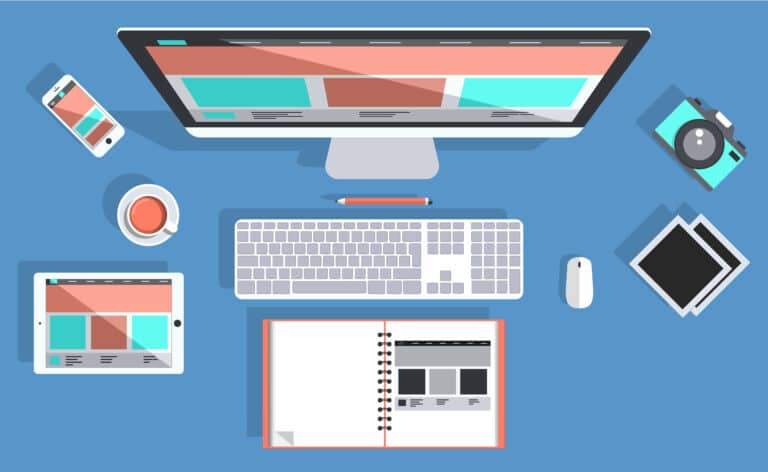
If you’re trying to design a website, it’s helpful to have an understanding of the steps involved. In this blog post, we’ll walk you through the process of web design step by step, from discovery to launch. We’ll provide tips on how to gather inspiration, develop wireframes, and create a style guide. So whether you’re a beginner or just looking for a refresher course, keep reading!
The Process of Web Design – Starting With The Basics
The “web design process” is a term used to describe the various activities and tasks involved in creating a website. It can be roughly divided into three phases: discovery, design, and development.
Discovery involves researching and strategizing about the website. This phase may include creating a sitemap, wireframes, and style guide. Design is where the creative work happens – it’s all about turning the discovered information into a beautiful, functioning website. Development is where the website is actually built, using code and templates.
A typical web development process will involve working with a team of people – including designers, developers, copywriters, and project managers – to get the job done. There are many different ways to approach this process, so it’s important to find one that works best for you and your team.
Phase 1: Discovery
The discovery phase is all about research and strategy. You’ll need to determine the purpose of the website, who your target audience is, what kind of content will be included, and what features are necessary. This is also the time to start thinking about the overall look and feel of the site.
Whether you’re designing a website for yourself or you’re architecting your clients’ websites, it is important to strategize the project during the discovery phase.
The research process can be as simple or as complicated as you want it to be, but there are a few key elements that you’ll need to consider:
- The purpose of the website: What is the website’s main goal? Is it to sell products, provide information, or generate leads?
- Target audience: Who is the website for? What are their needs and wants? Try creating a buyer persona to help you discover who your target audience is.
- Content: What kind of content will be included on the website? This may include text, images, videos, etc.
- Features: What features are necessary for the website? This may include a contact form, search function, social media integration, etc.
- The overall “look and feel”: What kind of atmosphere do you want to create with the website? This will be determined by the colors, fonts, and other design elements you choose.
In tandem with researching the above, the discovery phase will typically involve the following tasks:
Conducting stakeholder interviews
In order to get a clear understanding of the project, you’ll need to talk to the people who are invested in it. This may include the website’s owners, the target audience, and other stakeholders. During these interviews, you’ll ask questions about the project’s purpose, goals, and objectives. You can write up a questionnaire for your client to fill out before the meeting. Pre-meeting questionnaires are helpful because all the info you’ll need is in writing, and it gives everyone ample time to think these questions over.
Here are some questions you might want to ask stakeholders:
- What is the primary purpose of the website?
- Who is the target audience?
- What ROI (return on investment) are you hoping to achieve with the website?
- What are some of your favorite websites and why?
- What colors do you like/dislike?
- What is your budget for the project?
Establishing a schedule, accountability, & milestones
After you’ve gathered all of the necessary information, it’s time to establish a schedule and set some milestones. This will help ensure that the project stays on track and that everyone involved is held accountable. The schedule should include key dates for each phase of the process, as well as deadlines for specific tasks. For example, you might want to set a deadline for finishing the sitemap or completing the wireframes. You’ll also need to decide who is responsible for each task. This may be determined by expertise or simply by who has the bandwidth to take on additional work. For larger projects, it may be helpful to assign a project manager to keep everything organized.
Creating a sitemap
A sitemap is a tool that can be used to plan out the structure of a website. It typically includes a list of all the web pages on the site and how they’re interconnected. This is a helpful tool for both you and your team, as it provides a clear overview of the website’s hierarchy.
To create a sitemap, start by listing out all the pages you want to include on the website. Then, group those pages into categories (e.g., “About,” “Products,” “Blog,” etc.). Once you have your pages grouped, you can start to map out the hierarchy by determining which page should be the “parent” and which ones should be the “children.”
Here’s an example of what a sitemap might look like:

Developing wireframes
Wireframes are skeletal outlines of individual pages that can be used to plan out the layout and content of a website. They typically include placeholder text and images so that you can get a sense of how the page will look without getting bogged down in the details.

Wireframes can be created using a variety of tools, including pen and paper, Photoshop, Illustrator, or online wireframing applications like Balsamiq.
When creating your wireframes, keep the following in mind:
- Layout: How will the content be arranged on the page? What elements will be included and where will they be located?
- Content: Consider the type of content you will have per page as well as the amount of content. For example, if you have a lot of content on one page, you will probably need to wireframe a larger page with more sections.
- Interactivity: What elements on the page will be clickable? This may include links, buttons, forms, etc.
Once you have your wireframes complete, it’s time to start thinking about the visual elements of the website. This includes choosing colors, fonts, and other design elements that will be used throughout the site.
Creating a style guide
A style guide is a document that outlines the design elements that will be used on a website. This may include the colors, fonts, and other visual elements. The style guide will be used as a reference point during the design and development process.
When creating your style guide, consider the following:
- Color palette: What colors will be used on the website? This may include the background color, text color, link color, etc.
- Tip: Make sure you gather information on hex codes (value code made up of letters and numbers that represents a color) for your colors so that the colors per site are related and consistent!
- Fonts: What fonts will be used on the website? This may include the body font, headings font, etc.
- Design elements: What other design elements will be used on the website? This may include buttons, icons, forms, etc. Understanding the design elements will help you figure out how many fonts and colors you need to include in your style guide.
If you’re designing your own website, you may be able to skip some of the above steps. However, if you’re working with a team or you’re designing a website for a client, it is important to go through the motions of the discovery phase, even if it feels tedious, so that everyone is on the same page. Making sure you have all your ducks in a row where stakeholder opinions are concerned will save you a lot of time during the review and revision process later on.
Phase 2: Design
The design phase is where the creative work happens. This is the time to take all of the information gathered during the discovery phase and turn it into a beautiful, functioning website.
There are a few different steps involved in the design phase, which we’ll outline below.
Create placeholders for your pages
Within the content management system (CMS) or website builder you’re working in (e.g., WordPress, Wix, Squarespace), you’ll want to create a placeholder for each page on your website. This will ensure that all the pages are properly linked and that your site’s navigation is functioning correctly.
To do this, simply create a new page within the CMS for each page on your website. You can title the pages whatever you like (e.g., “Home,” “About,” “Products,” “Blog,” etc.). Once you have your pages grouped, you can start to map out the hierarchy by determining which page should be the “parent” and which ones should be the “children.”
Utilize wireframes to create a bare-bones skeleton of each page
Separating design from content (written content, images, etc.) within the design phase is helpful because you can focus more on the specifics of the design like spacing between sections and elements, button size, animations, etc.
Essentially, you should create the sections and elements that are included in your wireframes, but wait to add the content. This is sometimes referred to as a “lorem ipsum” or “placeholder” design.
Design the pages
Now that you have the structure of each page in place, it’s time to start designing each page’s sections and elements. This includes the header, footer, navigation menu, buttons, forms, etc.
When designing each element, consider the following:
- How will this element be styled? This may include the colors, fonts, and other design elements that will be used.
- How will this element be used? This may include the functionality of the element and how it will be used by website visitors.
- What is the purpose of this element? This may include the goal of the element and how it helps to achieve the objectives of the website.
It is also important to keep in mind web design best practices as you’re designing each element. This includes things like using proper font sizes, ensuring that links are clearly visible and underlined, using whitespace to create a visual hierarchy, etc.
Add content to your pages
Once you have the structure and design of your pages in place, it’s time to add the content. This may include written content, images, videos, etc.
If you are trying to implement SEO (search engine optimization) best practices into your website, you will need to take certain steps when adding content. Check out our blog for a full rundown on creating SEO-friendly content for a new website.
If your web design will have less emphasis on SEO, you will still want to consider how Google will interpret your content. This includes using tags (H1, H2, H3) to structure your content in a way that is easy for Google to understand.
Phase 3: Testing and Launch
After the design is complete and the content has been added, it’s time to test your website to ensure that everything is working properly. This includes testing the functionality of all elements on the page as well as checking for any broken links.
It’s also important to test your website on different devices and browsers to make sure that it is responsive and looks good no matter how it is accessed. You can use online tools like BrowserStack or Responsive Design Checker to test your website.
Once you’re confident that everything is working properly, it’s time to launch your website! Congratulations, you did it!
Common Problems During the Website Development Process
Although the website design process can vary depending on the specific project, there are a few common problems that you may encounter along the way.
Scope creep
One of the most common problems is scope creep, which occurs when the scope of the project (i.e., what needs to be done) starts to change and expand beyond the original plan. This can happen for a number of reasons, such as:
- New ideas are generated during the project rather than being caught within the research and discovery phase.
- The client requests additional features or changes to the design that were not included in the original project scope.
- The development team underestimated how long certain tasks would take and needed to add more time to the project schedule.
Scope creep can be avoided by maintaining clear communication with the client, setting realistic expectations from the start, and being mindful of the project scope throughout the process.
Lack of communication
Another common problem is a lack of communication, which can occur between the client and the development team, within the development team itself, or both. This can lead to a number of problems, such as:
- The client is unclear about what they want, leading to a design that does not meet their needs.
- The development team is unclear about what the client wants, leading to a design that does not meet the client’s needs.
- Changes are made to the design without proper communication, leading to errors or a subpar final product.
Lack of communication can be avoided by maintaining clear and open lines of communication at all times. This includes having regular check-ins with the client, setting up a process for feedback and revisions, and keeping the development team on the same page.
Unrealistic expectations
Another common issue is unrealistic expectations, which can occur when the client or the development team has an inaccurate understanding of what is possible within the scope of the project. Often, this is due to a lack of communication or understanding of the process. Unrealistic expectations can lead to disappointment, frustration, and delays for both the client and the development team.
To avoid this problem, it is important to set realistic expectations from the start and manage them throughout the project. This includes being honest about what is possible within the scope of the project and setting clear milestones and deadlines.
At DOS, we have found that providing examples of past work or competitor websites can be helpful in setting realistic expectations for the project. Using these real-life examples, you can simultaneously show the client what they can expect their own website to look like and help them figure out what they don’t want.
Design by committee
Lastly, another common issue is “design by committee,” which occurs when too many people are involved in the design process. This can lead to a website design that is either too weighed down by unnecessary bells and whistles or one that does not meet anyone’s expectations.
To avoid this problem, it is important to set clear roles and expectations for everyone involved in the project. This includes defining who will be providing feedback, how that feedback will be given, and when revisions will be made. It is also important to keep the lines of communication open and promote a healthy discussion about the design.
No matter how you slice it, website development can be tricky. That’s why we’ve put together this article on how to find a web design company so that you don’t have to worry about building a lead-generating machine AND running your business at the same time.
Conclusion

The website design process can seem daunting. However, by breaking it down into smaller steps, you can see that focusing on one task at a time makes the process more manageable. Furthermore, paying attention to the details during each stage of the process will result in a high-quality, well-designed website that meets the needs of both the client and the development team.
There are many moving parts to designing a website, but by following these tips, you can avoid some of the most common problems. By setting realistic expectations, maintaining frequent communication, and avoiding having too many cooks in the kitchen, you can streamline the process and end up with a website that everyone is happy with.
What tips do you have for streamlining the website design process? Share your thoughts in the comments below!
Frequently Asked Questions
What are some common development tasks that occur during the design phase?
Some common development tasks that occur during the design phase include creating wireframes, designing individual elements, and adding content to pages. Other tasks may also be included depending on the specific project.
What are some common challenges that occur during the design phase?
Some common challenges web designers can face during the design phase include figuring out how to balance form and function, making sure that all elements are properly aligned, and ensuring that the website is responsive.
What is the best way to avoid design by committee?
The best way to avoid design by committee is to set clear roles and expectations for everyone involved in the project. This includes defining who will be providing feedback, how that feedback will be given, and when revisions will be made. It is also important to keep the lines of communication open and promote a healthy discussion about the design.